Student Portfolios With Evernote

At the end of the school year, every student in the Primary School at The International School of Monaco gets a chance to show a portfolio of their work to their parents. The idea is simple; over the course of the year each class is given a small amount of time to bookmark work they would like to have in their portfolio and write a reflection to accompany it. The reflection should highlight why the work was selected, progression, challenges involved and perhaps how the work could be improved in future. In years gone by this was done using a combination of paper, ink and a photocopier. With the technology we have available today, far more efficient and interactive options are available.

Last year I tried QR codes, and despite being eye-catching, they were far too time consuming and inefficient. Therefore this year, I decided to use Evernote – an App that I had read a lot about but never really got to grips with myself; it turned out to be a very worthwhile shift.
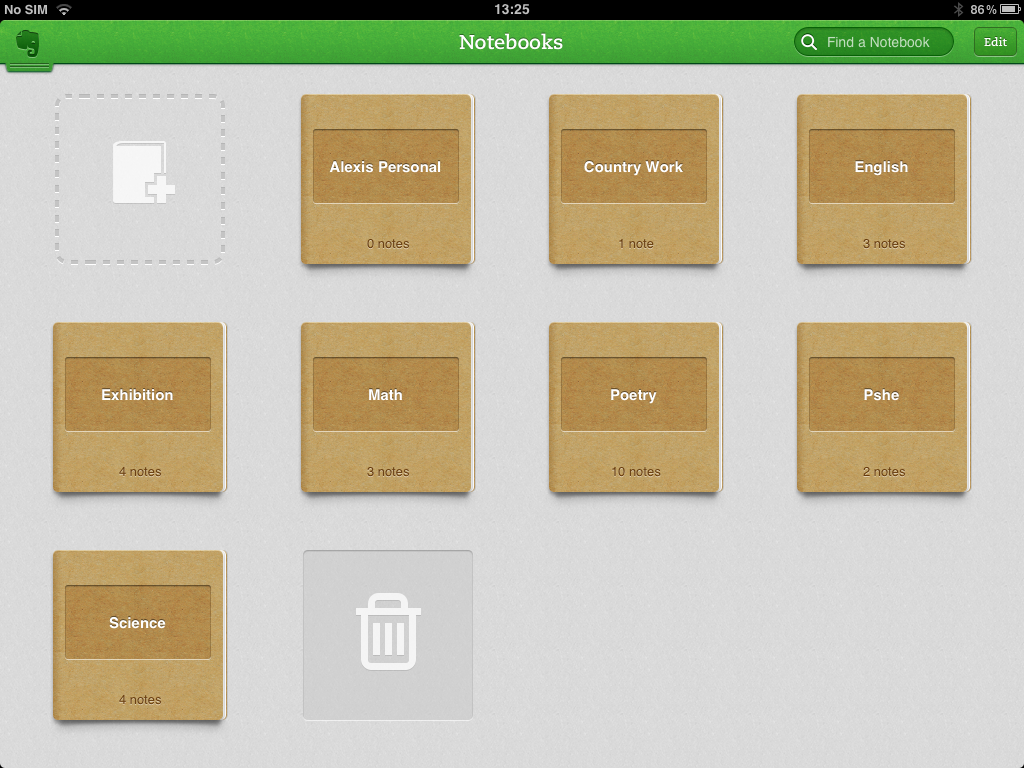
NOTEBOOKS:

As a class, we decided that using ‘Notebooks’ would be the best way to organise the portfolio (this could also done using the ‘tag’ feature). The children then decided upon their own subject-based categories:

Evernote Notebook Picture

NOTES:

As you can see, underneath the title of each notebook, the number of notes within the notebook is displayed. That simply means how many pieces of work were selected in each subject. If you click on a notebook, you can then select from the notes within. For example, by clicking on ‘Exhibition‘ in the example above you would arrive at the following screen

Notes Inside notebook

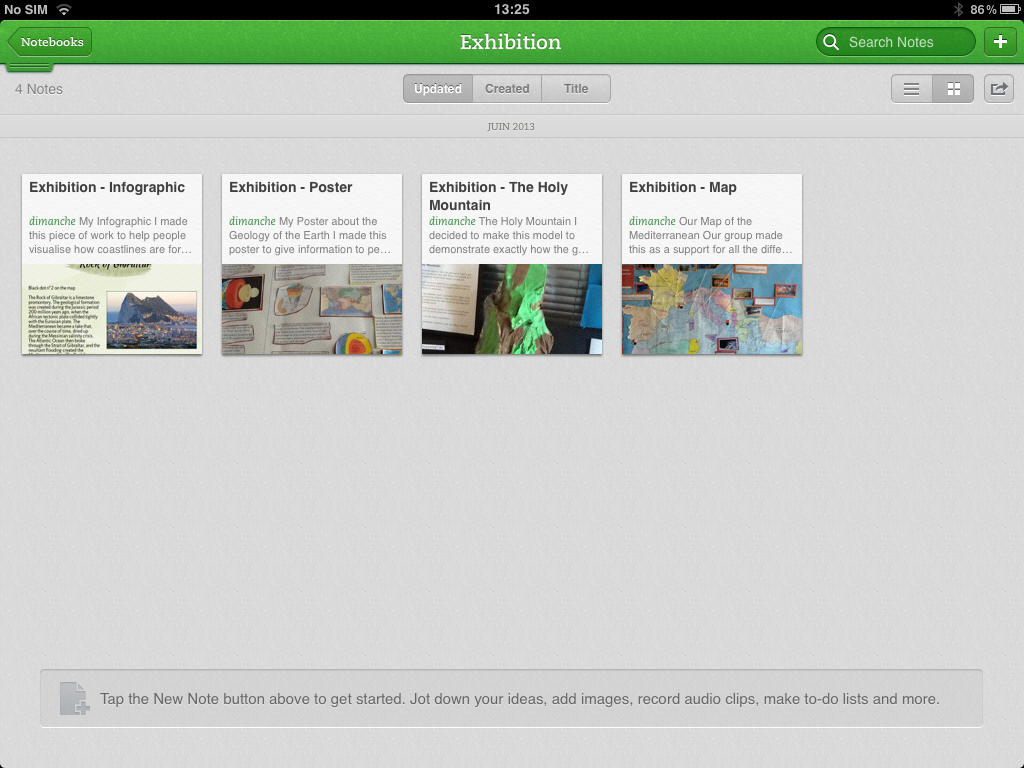
As you can see the navigation is simple and intuitive for both the students and whoever maybe observing the portfolio.

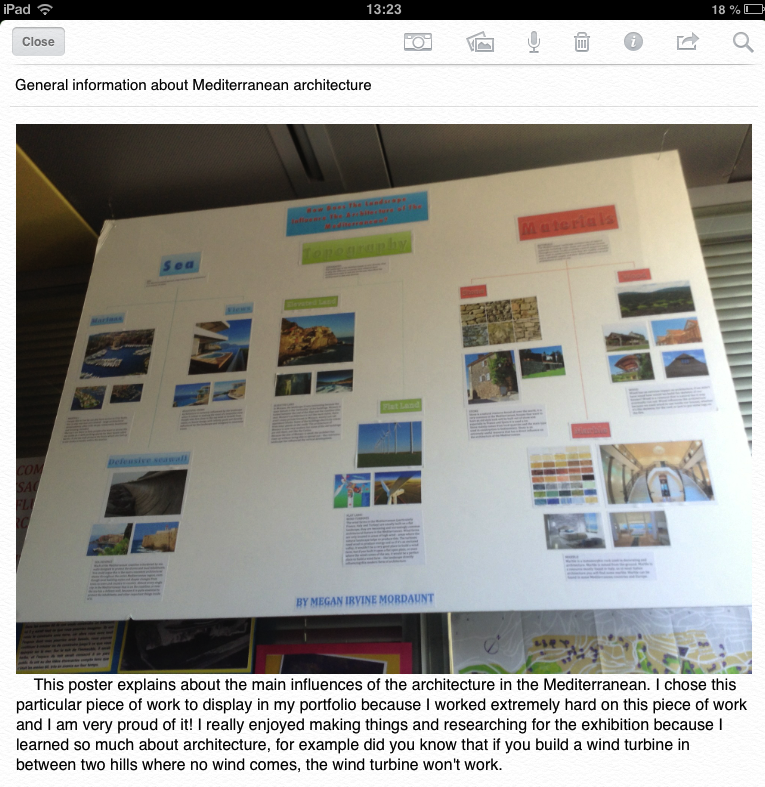
USING PHOTOGRAPHS/SOUND RECORDING:

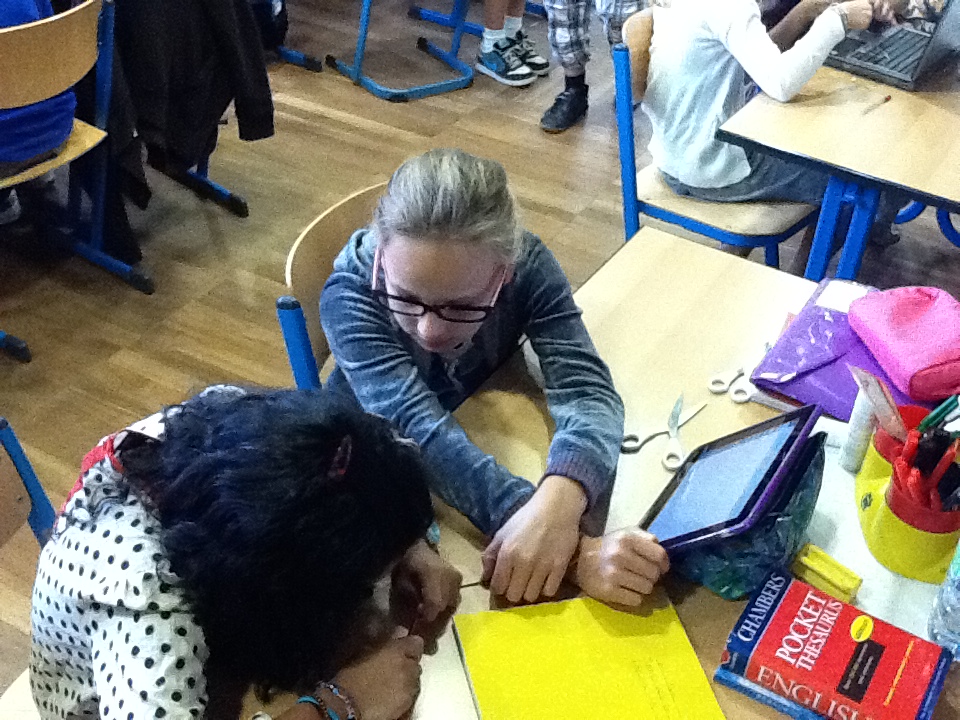
The real brilliance of Evernote though lies in the variety of ways that you can create notes. You can simply add text, or take a photo or add a photo from your photo library. You can even add a sound recorrding. The Photo function, in particular, proved incredibly useful when including artwork, book or display work and adding a reflection.

EN with Photo and reflection

SYNCING WITH EVERNOTE:

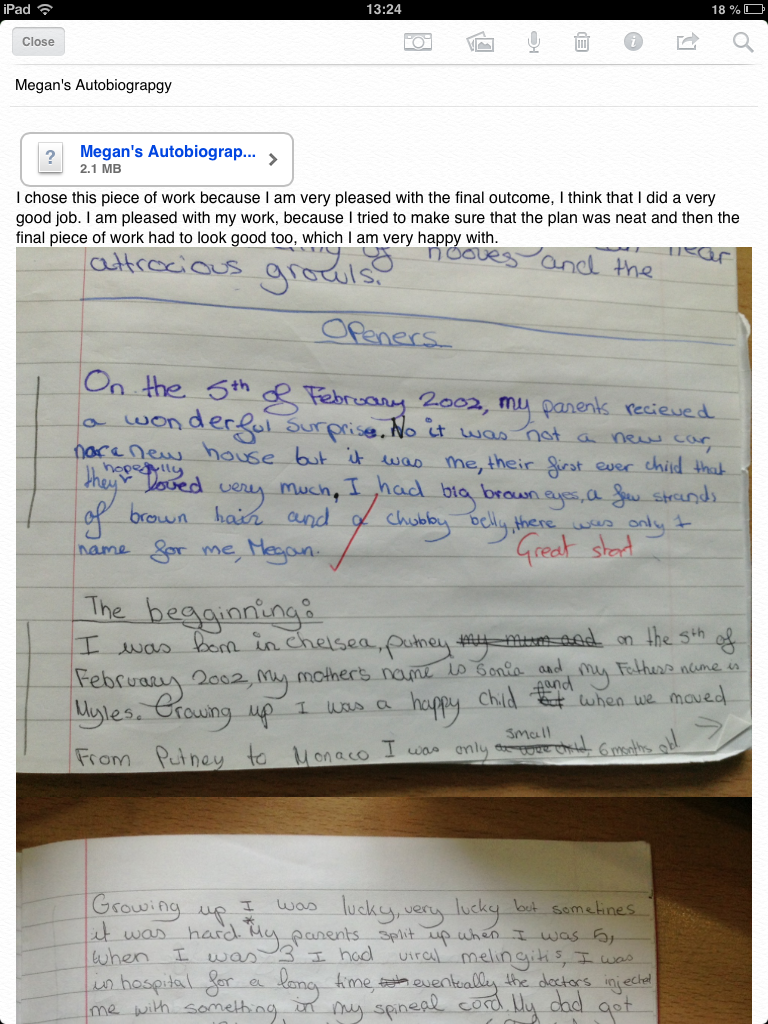
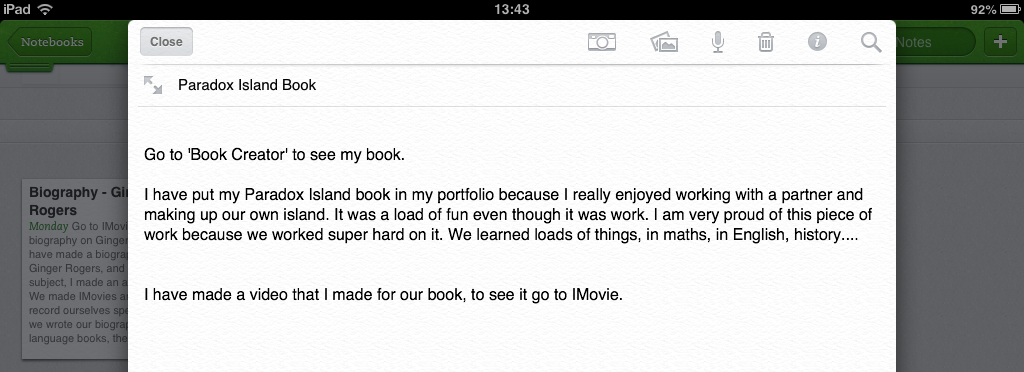
Another superb function of Evernote is its ability to sync with other Apps; ensuring productivity and workflow. This is particularly useful in portfolios when used in conjunction with the photo function. Students can then easily show how work has progressed from the original draft-work into a final publication. Here is an example of a note synced with Bookcreator, along with the original work and the reflection.

EN Draft + link to BookC

Evernote also syncs with Apps such Explain Everything and iMovie to name but a few. This capability meant that the children’s digital work was easily connected within their Evernote portfolio. In cases where the work was unable to be synced within Evernote, for example with Prezi or YouTube, we simply put a link within the note that took you directly to their work within the respective iPad App. In other words, as long as you had the Prezi App, the transition between reflection and student-work remained very smooth.

The only hang up with Evernote, for projects like this, is the limit in file size (60mb), unless you pay $5 a month for the premium version for 1GB of storage. Again though, there is a simple workaround. Our students simply put in a disclaimer at the top of their reflections that told the reader to navigate directly to the App in which the work was contained. For example:

Photo 20-06-2013 13 43 07

MY REFLECTIONS!

The shift to Evernote was a complete success. The children were able to collate examples of work from all subject areas (some even had PE videos) in a user-friendly, easy navigable and cohesive App. They synchronization between apps is superb and ensures workflow is optimized.  Many of the students themselves commented on how they enjoyed using the App and how they would, in the future, use it again for both school and non-school related work. I echo their sentiments entirely.

Solids, Liquids & Gases

My last ever topic at The International School of Monaco is Solids, Liquids & Gases and I really want to ensure I leave ISM with a bang… A more appropriate subject could not have been selected! Here is what we are getting up to:

HARLEM STATE OF MATTER:

To start the project off we had a class discussion about how molecules behaved in the major three states of matter. We then came up with a great way of demonstrating this which also kick-started their interest – The Harlem State (Of matter)!

This gave the children a pretty could grounding from which they could build their knowledge through interesting investigations and experiments.

EXPLAIN EVERYTHING

Next I wanted to get to grips with the awesome Explain Everything app. After a quick intro and demonstration of its capabilities, I simply set the task of researching a little further & explaining what they understood about the states of matter using the app! This is an example of the results:

We then used some easy, simple but fun experiment ideas from the brilliant Birmingham Science museum ThinkTank site. They have a monthly, ‘Experiment of the month’ and group them into sections that fit neatly with KS2 science expectations. Again, the ever-flexible Explain Everything proved a brilliant way to plan, hypothesize, film the experiment, collate results and conclude. Here is an example:

Does Air Have Mass?

Finally, we also looked at The Water Cycle. Again, Explain Everything was used by the students to demonstrate their understanding. Take a look at these two high quality examples; both done by 10 year old children…

How To Create A Virtual Country

Between October and December last year, our Year Six students created their own virtual country. Their final work was published to iBooks using the awesome Bookcreator App. It was a cross-curricular project that encouraged a variety of writing styles, collaboration and use of a whole host of digital resources. The project was a huge success and I would like to share our learning journey with you.

  • Step 1: Country Brainstorm. We used wallwisher and iPads for a whole class brainstorm on the Smartboard, to ascertain what a country needs to function
  • Step 2: Name The Country. They then studied Atlases and their features before they actually designed their country; and decided upon its location. This involved a substantial amount from the maths curriculum including co-ordinates and scale.

  • Step 3: Create a History. Students read, annotated and checked the features of chronological report writing using this checklist: checklist_chronological. Then they used Time-Toast to plan their histories, and finally wrote their first draft in their English books. We then re-distributed their English books and the chlidren then used the checklists again to provide peer-to-peer feedback. The work was then edited and published on the school blog. This enabled more feedback to be provided so their work could be improved further.
  • Step 4: Design a flag and invent its history. The students then analysed flags and their properties such as colour and symmetry. We also looked at the history of some well known flags and the origins of their respective designs.
  • Step 5: Graphical Analysis. All Year Six data handling can be included in this part of the project. We analysed different graph types and the difference between static and continuous data. The children then compiled realistic data on their countries before deciding which graph type to use to portray the data.

  • Step 6: Newspaper Front Page. Next we analysed the features of journalistic writing. We looked at the difference between broadsheets and tabloids, and all then examined real newspaper front pages and made notes of their features. Children then used a newspaper_planning_sheet to plan their stories, and again followed the process of drafting and peer checking in their books, followed by blogging and further peer feedback. Some of their comments are a masterclass of constructive and useful blogging feedback.
  • Step 7: News Broadcasts. The front page news stories were then re-written as scripts for a news broadcast. The children used their iPads and Smartboards to make the filming as realistic as possible.
  • Step 8: Establish the Rules. For this part we looked at child friendly versions of the the 10 commandments and the Bill of Rights. The children then set about constructing a bill of rights for their Virtual Countries.
  • Step 9: Advertising. We also managed to integrate persuasive writing into our Virtual Guides. Each partnership had to think of a product or service that their Virtual Country produced and then plan, design and produce an advert. Beforehand we went through features of adverts and persuasive writing.
  • Step 10: National Anthem. The children are fortunate to have separate music lessons at ISM, so I spoke with their music teacher and asked whether they could write lyrics and music for a national anthems for their Virtual Countries! Their final anthems were awesome! However, because they were recorded directly to their books using the book creator built in recording feature, I haven’t worked out a way of embedding them on a blog!
  • Step 11: Publication. Once all the above were done, the students has a few optional extras to add as well such as postcards & currencies. All their work was then either copied and pasted into Book Creator from our blog or written from their English books. The graphs and adverts were inserted by taking screen shots on the iPad and uploading from the camera roll. Other work like the flags and maps that were actually done by hand were simply added by taking photos and then adjusted and cropped accordingly. The children then spent considerable time formatting and designing their final publications before sending them to iBooks.
  • Step 12: Reflection. Finally, the children reflected on their work using these self evaluation proformas.
Overall, I was incredibly pleased with the projects. The children got so involved with their work that their Virtual Country guides were of the highest quality. If anyone has any ideas about anything else that could be added, I’d love to hear from you.


Encouraging Boys to Write – Football Blog

In Year Six I have just re-started the Year Six football blog in an attempt to encourage and improve writing, particularly from boys. Recent press reports have indicated that an unhealthy proportion of boys writing is well below the national standard in the UK, in fact according to the Daily Telegraph, they are around twice as likely as girls to fail in basic writing assessments.

It is well documented that this has nothing whatsoever to do with ability, moreover it is a motivation issue. I came across this fantastic article on The Globe and Mail, by Margaret Wente which suggested one possible solution was to ‘celebrate boys’ boyness’.

In a nutshell, this article summarises these main points:

  1.  Boys need to have a good relationship with the teacher.
  2.  Boys will only stay engaged as long as the work interests them.
  3.  Boys need purpose, to make a difference, to know they measure up.
  4.  Boys need challenge, above all, a need for a meaningful vocation.
  5.  Boys need purposeful work.
  6.  Boys long for to be a part of something bigger than themselves.
  7.  Boys love rituals, trophies and tradition.

So, taking this into account whilst also considering the fantastic work being done in the UK right now by @DeputyMitchell, who has used blogging to incredible effect to enhance boys writing levels, I thought I would relaunch our class football blog.

The current Year Six, like many other boys around the world, are football mad! So I thought I would attempt to harness this passion by encouraging them to write a weekly report on a game of their choice. Furthermore, each week the best report will win a coveted Football Bloggers Award in assembly!

I now have a team of nine budding football journalists who are actually asking if they can write on 2,3 or 4 games a week! The possibility of tweeting their articles direct to players or even simply using their teams hashtag in a tweet about their post has added even more incentive to their writing. In addition, I have used the same blog to model writing by jotting down my musings on being a home-sick Charlton Athletic fan; I contacted a few other CAFC sites (Dr Kish & Forever Charlton) who now include our posts as part of their blog news-feed! When the boys see their posts pop up elsewhere on the web, their excitement reaches fever pitch!

So far the experiment has been very successful, and I would love to set up links with other football mad school bloggers from around the world who could share their passion for football through writing. If anyone else would be interested in getting involved, please get in touch.

Choose Your Own Adventure Films – A Quick Guide

As we come to the end of our first term, I thought I would share with you one of the projects Year Six completed under the umbrella of our Learning Unit, ‘Decisions, Decisions’.

This is the fifth year that I have taught this topic and I felt it needed a shake up, especially when considering the wonderful new technology at our disposal. Previously, we had produced our own interactive choose-your-own-adventure (COYA) style stories. These were originally produced on powerpoint (remember that?) and we hyperlinked each decision to their respective slide and then they were saved on the school server, never to be seen again. Last year, we used Keynote, saved to PDF, published to Flipsnack and coded to our school blog.

This time however, we tried something completely different, CYOA films!

On Youtube over the summer, I had come across a film that had an annotation on it that linked to another film.  This got me thinking; we could use this feature to produce short films that ended in a dilemma in which there were two possible outcomes; or in other words a good decision and a bad decision. The viewer could then click on the annotation to see the respective consequences.

Before any hint of film-making took place, as a class we discussed decisions that children and young adults may face and considered what the consequences may be. The children then split into groups of fours and chose specific topics in which they would become experts and used the ‘Big Six‘ research method to investigate the dangers of topics such as smoking, healthy eating, alcohol, gambling and cyberbullying.

Once the children had ascertained sufficient knowledge and understanding of these topics, we discussed and learned the features of play-scripts and how to write them. They then set about creating play-scripts with three scenes:

  • Scene One – An introduction to the dilemma that ends with two possible choices. These choices were then added to the screen using YouTube’s annotate function and linked to two separate films (Scene Two or Scene Three)
  • Scene Two – This featured the consequences of making a good choice
  • Scene Three – This featured the consequences of making a bad choice
We then filmed all the respective scenes in and around ISM, and then took our films back to the classroom for editing and each group chose their music, subtitles, sound effects and film edits for their final movies.

Once the final edits were completed, I uploaded the films to my school YouTube account and ensured the privacy settings were set to private. I then added the annotations and the respective links to the films, including a link at the end of Scenes 2/3 that returned the viewer back to the beginning of scene 1. Although the students were more than capable of doing this, it was a simple way of eliminating any AUP issues. Similarly we ensured no real names were used at any point in the film.

Here are a couple of the final feature films – make your decisions wisely!

Once the films were all completed, we hosted a film premiere afternoon in our Learning Hub to which all parents/guardians were invited. We The afternoon was a great success. The class made flyers and brought in popcorn to add an extra sense of reality to the whole occasion.

CYOA Film Premiere Leaflet

Maths Academy Starts at ISM

Last week in Year Six we officially started our brand new Maths Academy. The arrival of iPads at ISM has meant many things and given me the oportunity personally to reflect on my own pedagogy. This is my seventh year of teaching, and to be honest during those seven years the way I taught maths had hardly changed. Indeed, I was still using some of my old Smartboard files to teach with. Any teacher will tell you that collating old resources is a valuable thing to do, however I had to question exactly what value was this adding? Sure, it saved me time, but as for the children in my class? Therefore I thought how could I incorporate the iPad into my maths lessons to re-energize the classroom experience for the learners and for me – I then came across the awesome ShowMe App and an idea sprang into my mind.

You may or may not have heard of the Khan Academy; an online maths tutoring programme that delivers on its promise to give a free world class education to anyone, anywhere. Using ShowMe I realised that the children could actually create their own mini-lessons, empowering them not on as learners but as educators too.

Rather than traditional question and answer mathematics – I wanted the children to think about the maths behind the answers and deepen their understanding of mathematical concepts, and I believe that our burgeoning maths academy demonstrates that it is already happening.

Please take some time to have a look at the great work the kids have produced and leave some comments. Maths Academy

How To Make Your Own iPad Stylus!

After using the excellent ‘showme app‘ last week, the main problem we came across was the neatness of handwriting. Without an iPad stylus, our fingers were all we had and quite frankly were not good enough! An iPad stylus retails for €20+, so we decided to find a solution of our own… I quickly put this ‘showme’ presentation together at the weekend, then class six logged into the ‘showme’ site and followed the instructions! 15 minutes later we had  a class set of iPads stylus’ without spending a penny (thanks to the science dept for the wire!)


Blogging Club to Start at ISM

Due to the remarkable enthusiasm shown by Year Six and their new blog, I plan to start a blogging club on Tuesday lunch times in which we can discuss all things blog related. The aim in the long run will be that the children are self sufficient bloggers, who can design and maintain their pages independently.